|
|
Installing Inventory Pro/Ultra with MSDE
In this document:
- Who This Document Is For.
- System Requirements.
- Installing the MSDE Component
- The Inventory Databases
- Sharing a Database.
- Inventory Configuration.
- Troubleshooting Login Problems.
Inventory Pro/Ultra can be set up as an isolated, single-computer installation, or as a shared database that can be accessed from other computers on the network. If you are setting up a single-computer installation, simply perform all of the installation steps for both server and clients on the single computer.
Who This Document Is For
System Administrators. You must have administrator privileges to set up the Inventory databases.
System Requirements
All computers:
- Windows 2000 or XP Professional.
On the computer acting as the Server you must install:
- Microsoft SQL Server Desktop Engine (MSDE).
- Microsoft .NET framework 1.1
- The CambridgeSoft Inventory databases.
- Installing the Inventory application on this computer is optional.
On all client computers you must install:
- CambridgeSoft Inventory/Ultra or Inventory/Pro.
- ChemDraw 9 ActiveX component
- Microsoft .NET framework 1.1
- MDAC 2.6 or higher
The appropriate CambridgeSoft installation Wizards have options for installing all of these components.
Installing the MSDE Component
If you are running a firewall (ZoneAlarm, Norton, etc.) it must be turned off before starting the installer.
If you are using the CambridgeSoft installer, it will create an MSDE instance named CAMBRIDGESOFT.
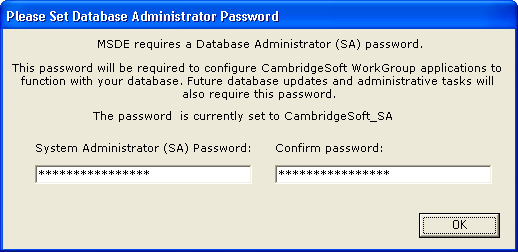
The default password for the MSDE super-administrator (SA) account is CAMBRIDGESOFT_SA. This can be changed from a dialog box in the Wizard.
When MSDE is installed on the local machine (the same computer as Inventory), the first time you open Inventory after installation, a dialog box appears asking you if you want to create the Inventory database tables. If you answer Yes, the Attach Inventory Database dialog appears. You can access this dialog box at any time from the Setup drop-down menu on the Inventory Login screen.
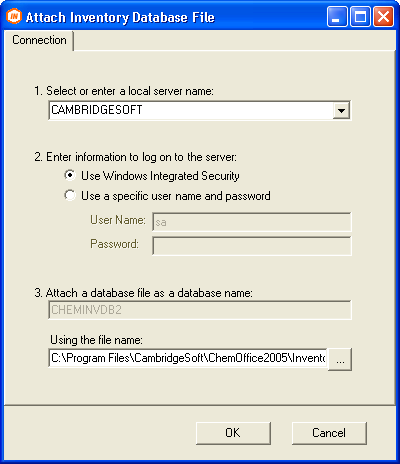 To set up the database:1. The local database name is already entered as CAMBRIDGESOFT. This is the name of your local MSDE instance.2. If you are logged in to your computer as a local administrator, use the default "Windows Integrated Security". If you are not a local administrator of the computer you are working on, use the "specific user name and password" option. Use the default User Name (sa), and enter the password used to set up MSDE (default: CAMBRIDGESOFT_SA).
- The system sets up two databases, with the user name invadmin and a blank password. You are advised to change the password using the Change Password command in the Setup drop-down menu on the Inventory Login screen.
NOTE: You must be an administrator to do this.The Inventory Databases
Setting up and maintaining an Inventory database requires a substantial time commitment. Adding changes to, or replacing, existing data due to a change in the database structure can be not only time consuming but tedious. For this reason, it is a very good idea to start by creating a small test database, and work with it for a while in real-life situations to see how well it meets your needs as designed. The small database can be more easily reconfigured and retested until you are completely satisfied with the design.
CambridgeSoft Inventory facilitates this two-tier design-test-implement model by automatically creating two databases: CHEMINVDB2 (the Production database) and CHEMINVDB2Test (the Test database). By default, the Test database is active when you start Inventory.
To switch the active database:
1. Select Application Configuration from the Setup drop-down menu on the Login screen.2. In the Application Configuration dialog box, select the active database.

3. Click the Save button.You can type in the name of any available database on the Login screen for one-time entry. The next time you start Inventory, it will revert to the active database saved in the configuration.
Sharing a Database
To share an MSDE database, you must first of all set sharing on the folder containing the data files so that users can connect to them through the network. For maximum security, share only the two \MstFiles folders. These are located in C:\Program Files\CambridgeSoft\ChemOffice2005\Inventory\ as \Data\Production\MstFiles and Data\Test\MstFiles.
To set sharing:
1. Navigate to the data folder to be shared. If you wish, you can set different sharing for the Test and Production databases.2. Right-click on the folder, and select Properties.
- The Data Properties dialog box appears.
3. Go to the Sharing tab, and click the Share this folder radio button.4. Click the Permissions button, and add the user names of those who will have access to the files. You can use the default Everyone, but this is generally not recommended for security reasons. Users should have permission to Change files.TIP: Full Control would give users permission to delete files as well. This is unnecessary, and poses a security risk.5. Click OK twice to save and exit the sharing setup.Inventory Configuration
NOTE: It is extremely important that you configure your application to point to the MST files on the database server. If you change the database server but do not reset the MST files you are pointing to, Inventory will not be able to record changes to the database correctly.The second step is to configure Inventory to open the shared database. Users on remote computers do not need any special permissions on the server to do this - the permissions set by the local administrator when sharing the database folder are sufficient.
1. Start the Inventory application.2. From the log on screen, click the Setup button, and select Application Configuration.
- The Review/Edit Application Configuration dialog box appears.
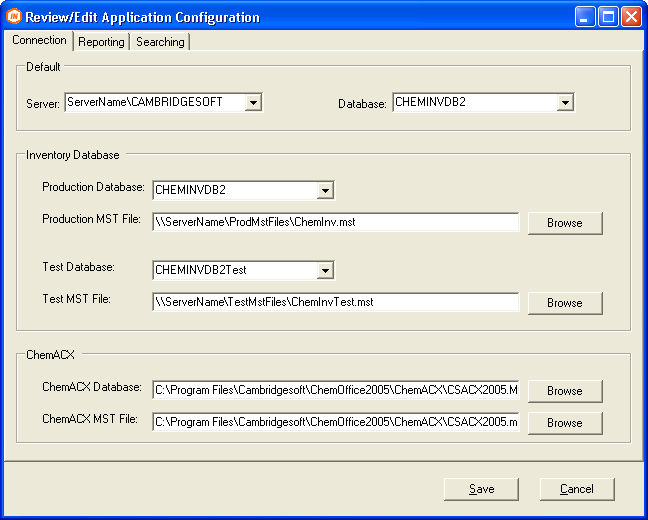 3. In the Server field, enter the Inventory server, for example, ServerName\CAMBRIDGESOFT.4. In the Database field, select the desired database (test or production.)5. Type the paths to the shared folders into the respective fields. For example, type \\ServerName\ProdMstFiles\ChemInv.mst where ProdMstFiles is the share name of the shared folder on the server. Alternately, use the Browse buttons to locate the database files.6. When all of the fields have been reset, click Save.
- A message appears telling you that you must restart Inventory. When you click OK, Inventory closes.
 7. Restart Inventory and log on.
- You are connected to the shared database.
- Back
Troubleshooting Login Problems
If the login fails, you may see the "server does not exist" message:
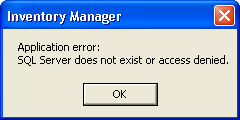
Assuming the user name should have access, this usually means that either Inventory has not been properly configured, or that the SQL Server Service Manager is down. Service Manager is normally set to start automatically when you boot your computer. If, for some reason, it has been stopped or shut down, and MSDE is installed on the local machine, do the following:
1. Look in the Windows taskbar (next to the clock) for the server icon.. The green arrow indicates that Service Manager is running. If Service Manager is running, check the Inventory Configuration. If Service Manager is paused or stopped, skip to step three. If you do not see the icon:
2. Click the Windows start button, point to All Programs (XP only), then Startup, and choose Service Manager.
- The Service Manager icon appears in the taskbar with a red square,
indicating that it is stopped.
3. Double-click the icon in the tray.
- The Service Manager GUI appears.
4. If you have access to more than one server, select the server from the drop-down menu.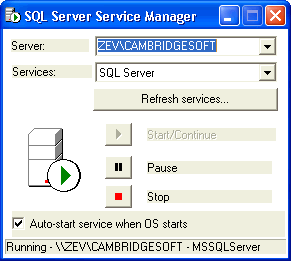 5. Click the Start/Continue button.6. Click the Close button.
| CambridgeSoft Corporation | CambridgeSoft.com | Voice: 1 800 315-7300 | 1 617 588-9300 | Fax: 1 617 588-9390 | support@cambridgesoft.com |